
 |
| Layering with Encircled in Friendship |

Hello and welcome to Around the World on Wednesday Blog Hop! We are glad you have joined us and look forward to spending time with you as we share "layer up!" inspiration with you. So sit back and enjoy your favorite cuppa as you enjoy your trip Around the World on Wednesday!
Today's Project
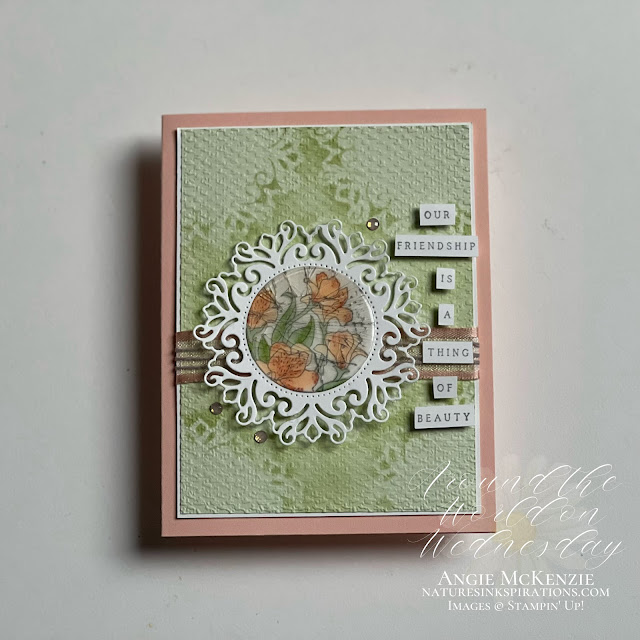
How many layers can you add to card and it still fit into an envelope?!? I created a card front with 21 layers (seen and unseen)!
Project Details
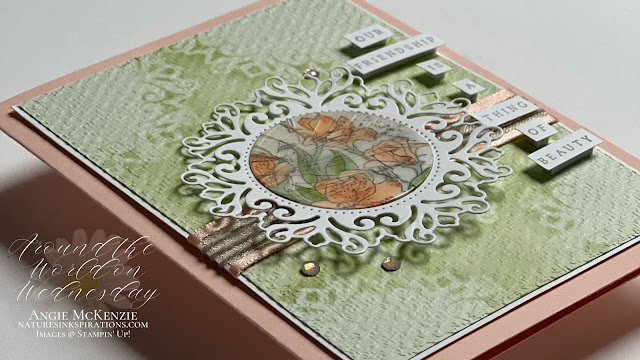
The fun began with die-cutting one of the Encircled in Beauty Dies from Basic White Cardstock twice. One of the die-cuts was used as a stencil creating a pattern on the Soft Sea Foam layer with a sponge dauber and Soft Sea Foam ink. The sponged layer was embossed with the Tasteful Textile 3D Embossing Folder and adhered to Basic White Cardstock layer.
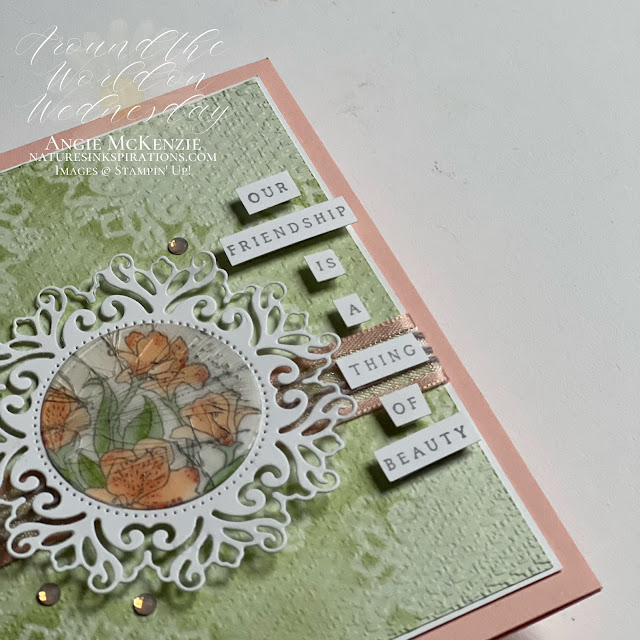
A circle was die-cut to fit just inside the 2nd detailed die-cut being used as the focal point of the card. The alstroemeria image was stamped with Smoky Slate ink and colored with Stampin' Blends. The Cracked Glass Technique was used to create this enamel center. The colored image was pressed into a VersaMark pad with a Post-it Note. The inked image was covered with Clear Stampin' Emboss Powder and heat set until it was clear. While the embossing was still hot, additional clear embossing powder was added and reheated. This process was repeated for a total of nine times to obtain the thickness I was looking for. The circle was put into the freezer for 30 minutes while I worked on the other layers of the card. The circle came out of the freezer slightly curled, but that's ok, as it makes the cracking process easier. A second circle was adhered to the back once I was finished. Smoky Slate ink was added to the surface with a sponge dauber paying special attention to the cracks. The ink was wiped away with a microfiber cloth. The cracked layer was adhered to the second detailed die-cut with Multipurpose Liquid Glue. [NOTE: If you love this technique as much as I do, click here to see a cracked teapot I created using this technique.]
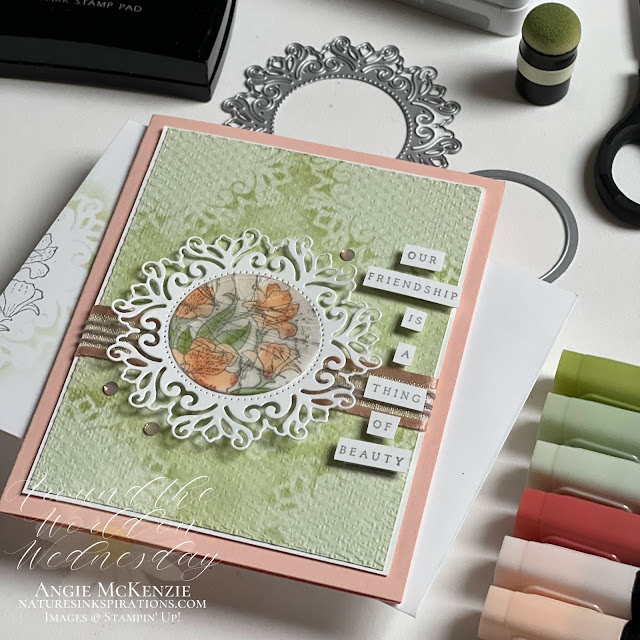
The Petal Pink 5/8" Organdy Striped Ribbon was wrapped around both card layers and adhered with Tear & Tape Adhesive. Three strands of the Gray Granite Baker's Twine was wrapped around the Petal Pink Organdy Ribbon three times and tied off with a knot along the back. The back of this card layer was layered up twice to make the layers flush with the ribbon and twine.. layering up this layer gives it a floating affect on the card front. A third circle was die-cut to create a floating layer for the center detailed die-cut.
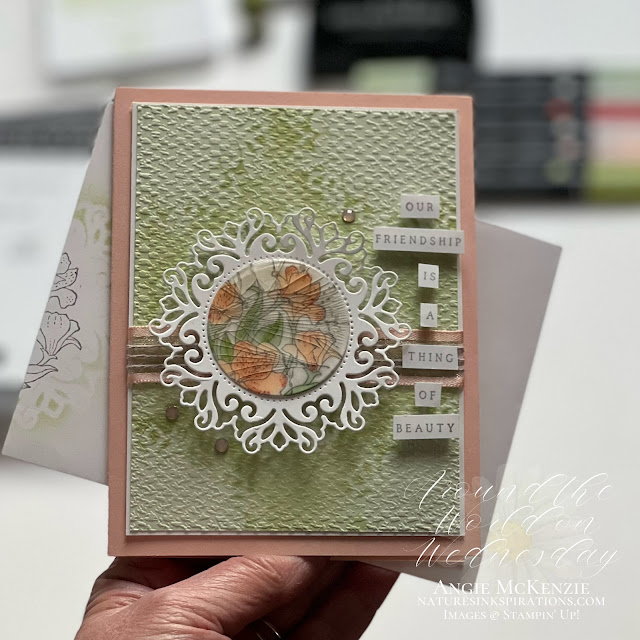
The Wave of Inspiration sentiment was stamped with Smoky Slate ink on Basic White scraps, trimmed and adhered with Foam Adhesive Strips. Elegant Faceted Gems were added for a finishing touch.
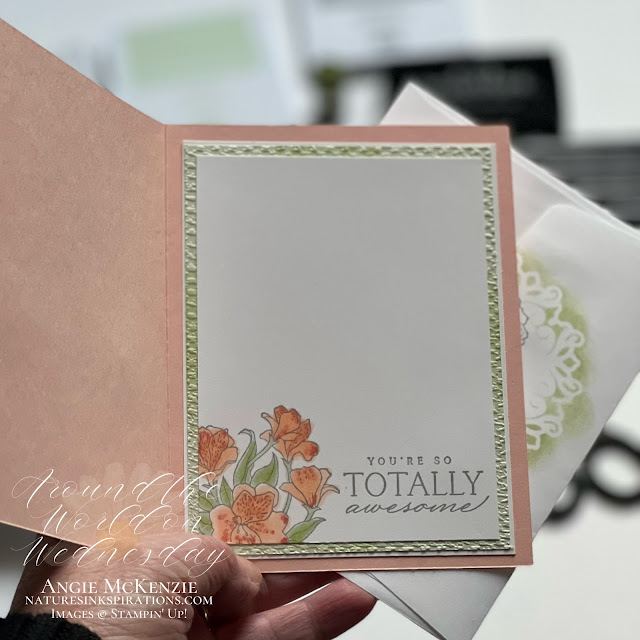
The inside layers were replicated to compliment the card front leaving plenty of room for handwritten correspondence to the recipient. The envelope front and flap were sponged and stamped to give the recipient a sneak peek of what's inside.
THE AWOW TEAM
THIS IS US
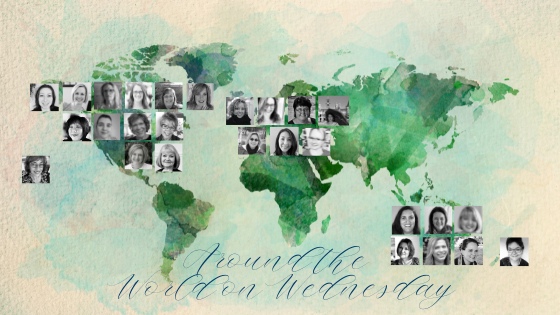
We are such a diverse and fun group of stampers from all over the world! Fifteen (15) of my Stampin' Up! Demonstrator friends are joining me today in this worldwide hug that stretches all the way from New Zealand to Hawaii across twelve different time zones. We love sharing sunshine with you through projects from our individual parts of the world on these second Wednesdays of the month. I hope that you are being filled with lots of inspiration.
More Inspiration
I hope this project has helped you imagine different ways you can create cards using lots of layers. Now, hop along with me, Angie McKenzie, to see more Wednesday inspirations from my amazing friends Around the World. Just click the daisy below to go to my friend, Wendy, as she shares her amazing project, or scroll down the name list to follow along because you sure don't want to miss any.


You Can Make This Card!
Here's What You'll Need to Get Started...
BASICS
- Clear Blocks D, H; Stamparatus; Small Grid Paper; Paper Trimmer; Stampin' Cut & Emboss Machine; Heat Tool; Paper Snips; Sponge Daubers; Multipurpose Liquid Adhesive; Tear & Tape Adhesive; Foam Adhesive Strips
- Clear Blocks D, H; Stamparatus; Small Grid Paper; Paper Trimmer; Stampin' Cut & Emboss Machine; Heat Tool; Paper Snips; Sponge Daubers; Multipurpose Liquid Adhesive; Tear & Tape Adhesive; Foam Adhesive Strips
STAMPS
- Encircled in Friendship Cling Stamp Set (bundled savings with the Encircled in Beauty Dies); Waves of Inspiration Cling Stamp Set (bundled savings with the Waves Dies)
- Encircled in Friendship Cling Stamp Set (bundled savings with the Encircled in Beauty Dies); Waves of Inspiration Cling Stamp Set (bundled savings with the Waves Dies)
INK
- Soft Sea Foam and Smoky Slate Classic Stampin' Pads; VersaMark Pad; Petal Pink, Calypso Coral, Soft Sea Foam and Granny Apple Green Stampin' Blends Combo Packs
- Soft Sea Foam and Smoky Slate Classic Stampin' Pads; VersaMark Pad; Petal Pink, Calypso Coral, Soft Sea Foam and Granny Apple Green Stampin' Blends Combo Packs
PAPER
- Petal Pink, Soft Sea Foam and Basic White Cardstocks; Basic White Medium Envelopes
- Petal Pink, Soft Sea Foam and Basic White Cardstocks; Basic White Medium Envelopes
OTHER
- Encircled in Beauty Dies (bundled savings with the Encircled in Friendship Stamp Set); Layering Circles Dies; Tasteful Textile 3D Embossing Folder; Baker's Twine Essentials Pack; Petal Pink 5/8" Organdy Striped Ribbon; Basics Embossing Powders; Elegant Faceted Gems
- Encircled in Beauty Dies (bundled savings with the Encircled in Friendship Stamp Set); Layering Circles Dies; Tasteful Textile 3D Embossing Folder; Baker's Twine Essentials Pack; Petal Pink 5/8" Organdy Striped Ribbon; Basics Embossing Powders; Elegant Faceted Gems
You can purchase any of these supplies from my online store if you live in the USA and do not already have a Stampin' Up!® demonstrator.
Time to Use Your Paper Trimmer!
PAPER CUTS
- Basic White - 3-5/8" x 4-7/8" (x2); 3-3/8" x 4-5/8"; scraps for stamping, die-cutting and layering
- Soft Sea Foam - 3-1/2" x 4-3/4" (x2)
- Petal Pink - 8-1/2" x 5-1/2" scored at 4-1/4" (card base)
- Basic White - 3-5/8" x 4-7/8" (x2); 3-3/8" x 4-5/8"; scraps for stamping, die-cutting and layering
- Soft Sea Foam - 3-1/2" x 4-3/4" (x2)
- Petal Pink - 8-1/2" x 5-1/2" scored at 4-1/4" (card base)
Although your faux enamel centrepiece is a stunner, it looks even more amazing with your gorgeous stencilled and embossed base. Such a thing of beauty, Angie!
ReplyDeleteWhat a wonderful composition with such well executed details. I love how your stenciled background.
ReplyDeleteWow Angie! That is a beautiful card! You are the queen of layers, even your ribbon has a layer. I like that idea!
ReplyDeleteWow Angie, this is a stunner. So elegant and gorgeous! That cracked glass centrepiece is so beautiful. xxx
ReplyDeleteStunning! LOVE, LOVE, LOVE the cracked glass! It's been ages since I have tried this. I will have to bring it back out. I also adore how you brought the design and layers to the card inside.
ReplyDeleteWOW! I always love your creations for their incredible technical level! It's so fantastic what you have created and the care taken to realize the smallest details! It is truly exquisite! Thank you for this amazing share!
ReplyDeleteAngie this is absolutely beautiful Cracked Glass technique is now on my list of techniques to try. What an interesting effect. Love your card with all the detailed layers x
ReplyDelete